Find Devices Connected To your Wifi Network
The method is very simple and depends on a cool tool that will work on your PC and will scan all the devices connected to your wifi network. Just follow up the below steps to proceed.
Steps To Trace All The Devices Currently Connected To Your Wifi
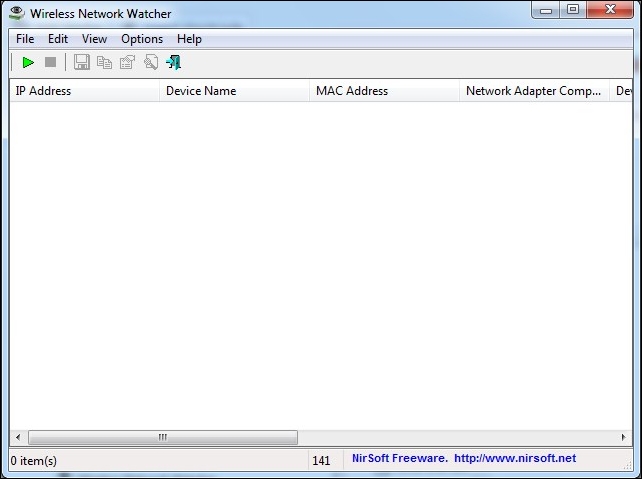
Step 1. First of all in your Windows PC download and install the cool tool to scan devices at wifi network that is Wireless Network Watcher. Once you installed, you will see the screen like below.
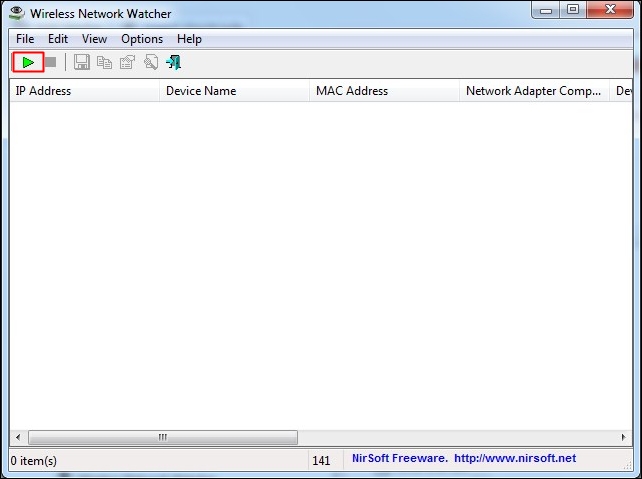
Step 2. Now connect to the wifi network in which you want to check the connected devices and launch the tool on your PC and click on “Start Scanning”
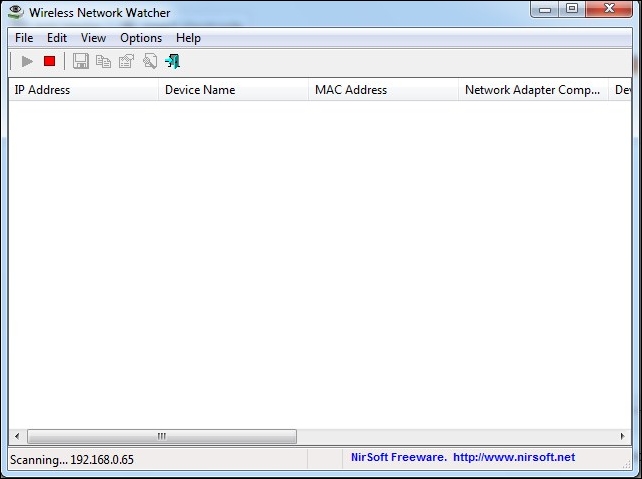
Step 3. Once you clicked on Start Scanning, you need to wait for few seconds until it finishes the search for your connected devices on your Wifi Network
Step 4. Now you will see the list of all the devices with their IP address that currently being connected to your device.
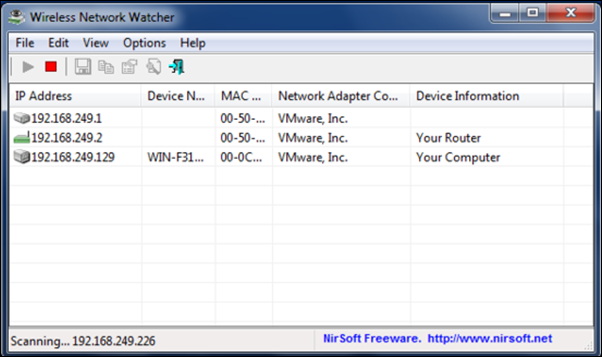
That’s it now you can check out the owner of that IP address and can trace that person.
Using SoftPerfect WiFi Guard
SoftPerfect WiFi Guard will alert you if your network is used without your knowledge. WiFi Guard is a specialized network scanner that runs through your network at set intervals and reports immediately if it has found any new, unknown or unrecognized connected devices that could belong to an intruder.
Step 1. First of all, you need to download and install SoftPerfect WiFi Guard on your computer and run it.

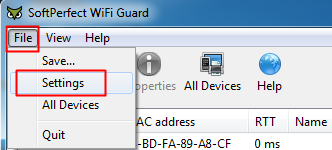
Step 2. Now you need to go to File and then select the option Settings
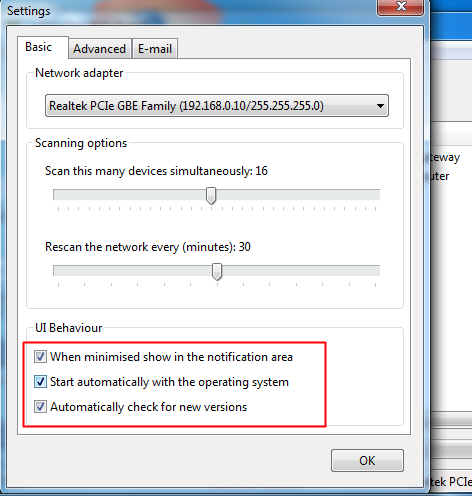
Step 3. Now enable the last three options
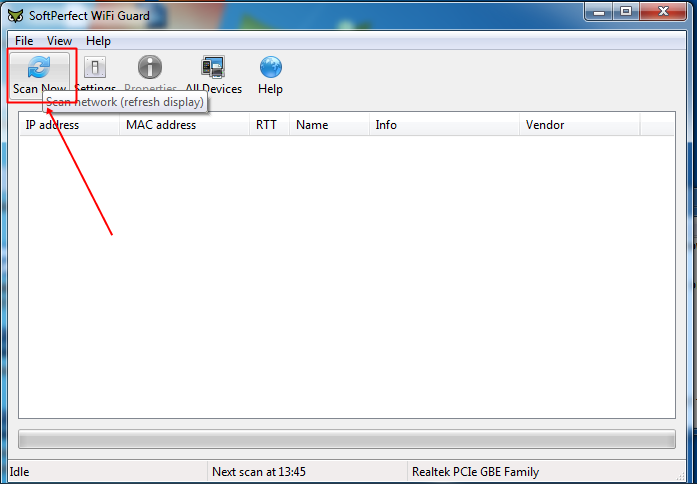
Step 4. Now click on “Scan Now.”
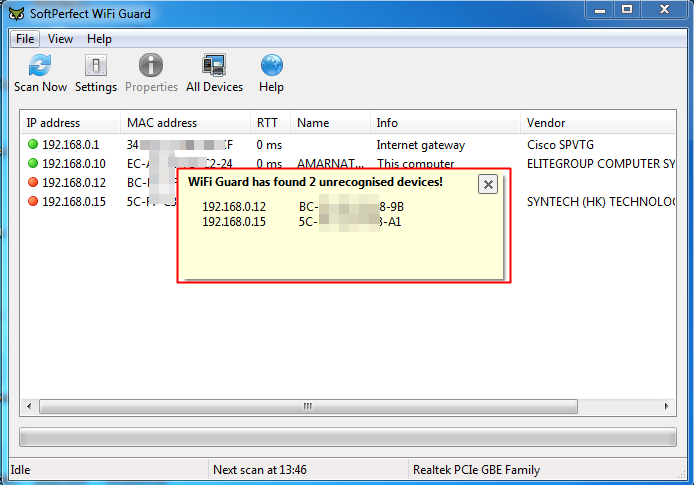
Step 5. If any unrecognized device connects with your WiFi network, it will notify you.
Using Fing IP Network Scanner
You need to download the Fing IP Network Scanner to access the superfast and reliable Network IP and Wi-Fi Analyzer on a Windows Machine. This is actually not a tool, like SoftPerfect Wifi Guard this actually works in a command line which will give you the MAC and IP address of all connected network. Lets’ know how to use it.
Step 1. First of all, you need to visit Fing.io and then need to download and install Windows- IP Network Scanner on your Windows computer.
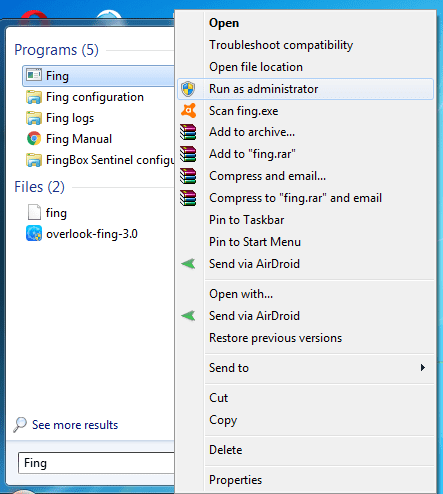
Step 2. Once installed you need to right click on the “Fing” from the start menu and then select the option “Run as administrator”
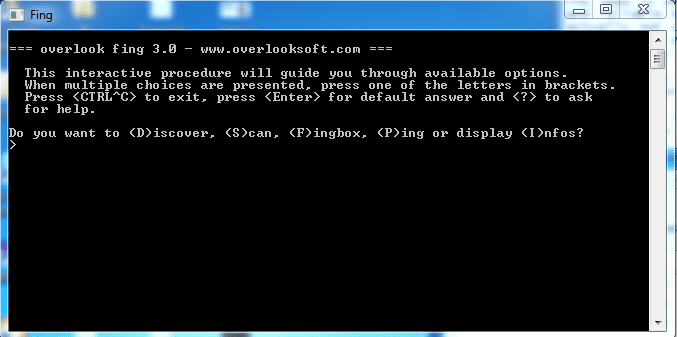
Step 3. Now you will see the screen like below, here you need to select the option Discover. So, you need to type D and then hit the Enter button.
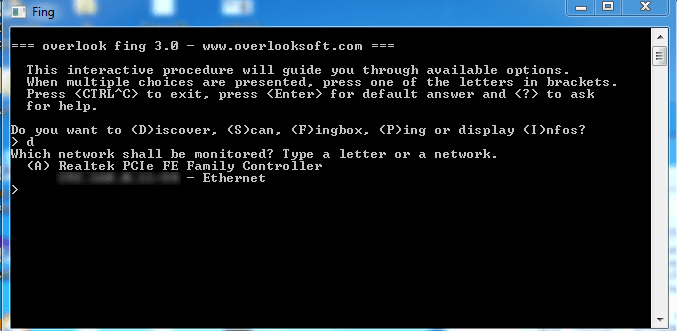
Step 4. Now it will ask you to select the network that you want to monitor by selected the assigned letters. Simply select the network that you want to scan.
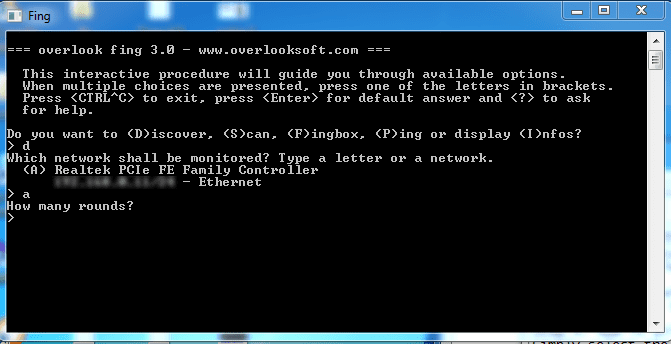
Step 5. Now you will be asked to select how many rounds. Simply select “1” to continue.
Step 6. Now you will be asked some more questions like do you want to discover domain names, do you want the output in Log or text, which format do you prefer etc., simply select all according to your wish.
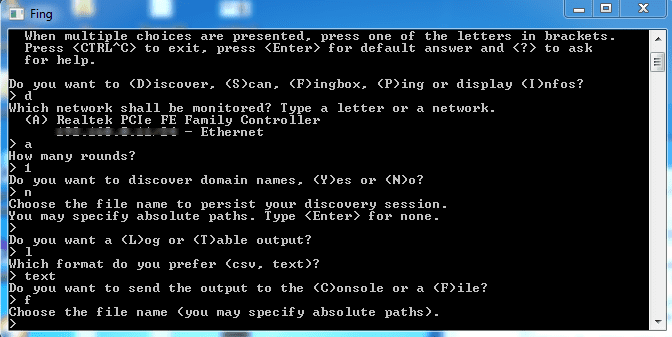
Step 7. After selecting all, you will be asked: “Do you execute it now” here you need to Type “Y” to continue.
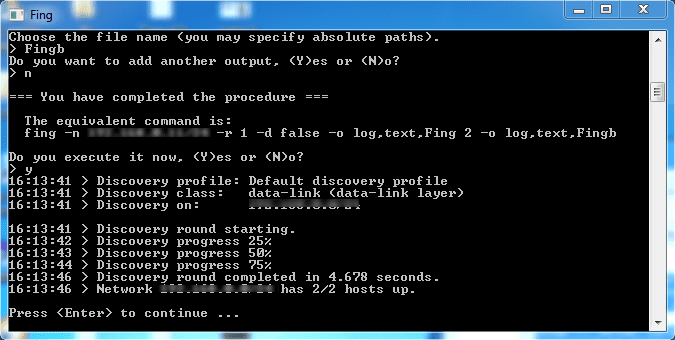
Step 8. Now it will scan for the network and you will find the output file on the desktop.
That’s it! You can now see all the connected devices to your Wifi network.


0 comments:
Post a Comment